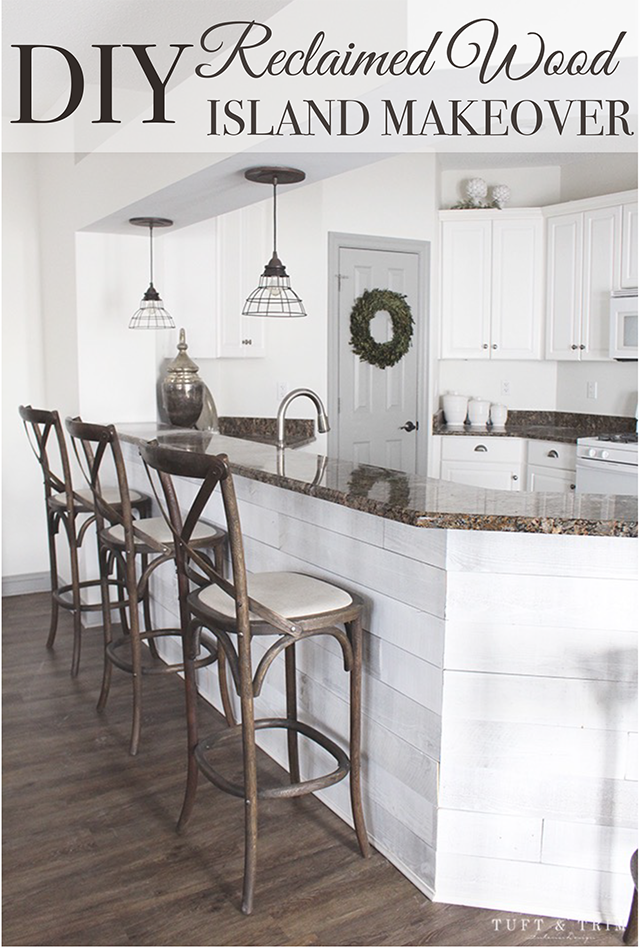
Once again, I am amazed at how an easy and affordable project can make such an impact
on a space. At our house, we are constantly thinking of creative ways to update our place,
but without spending a lot of money. Covering our kitchen island with this reclaimed barn wood
was the perfect way to transform our space on a budget. If you’re looking for ways to upgrade
your kitchen, or any room for that matter, save some money and learn how to do it yourself with
this step by step tutorial.
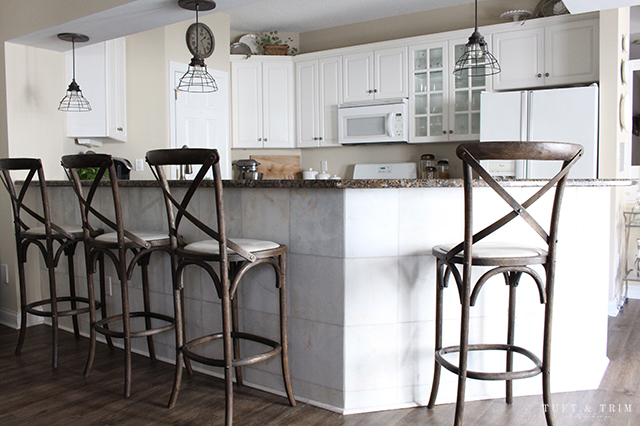
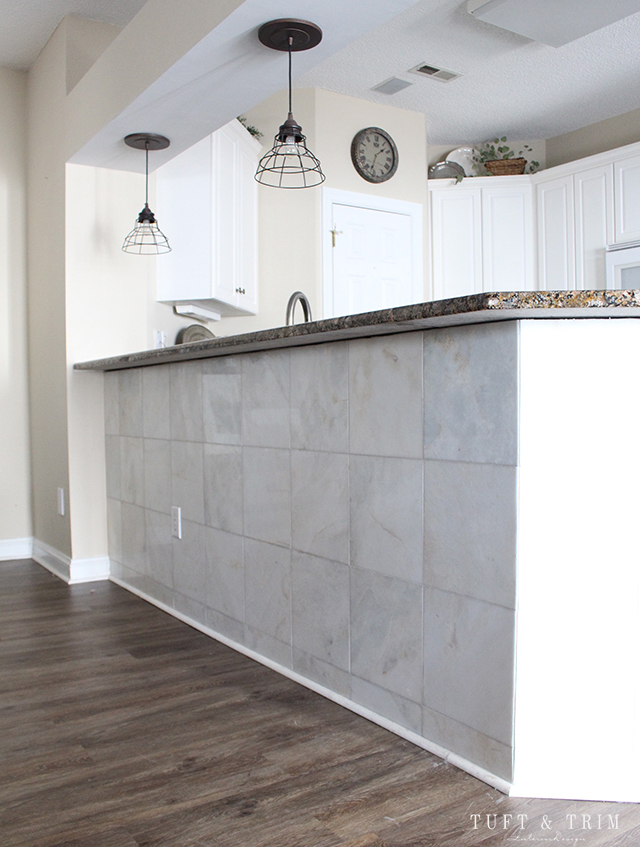
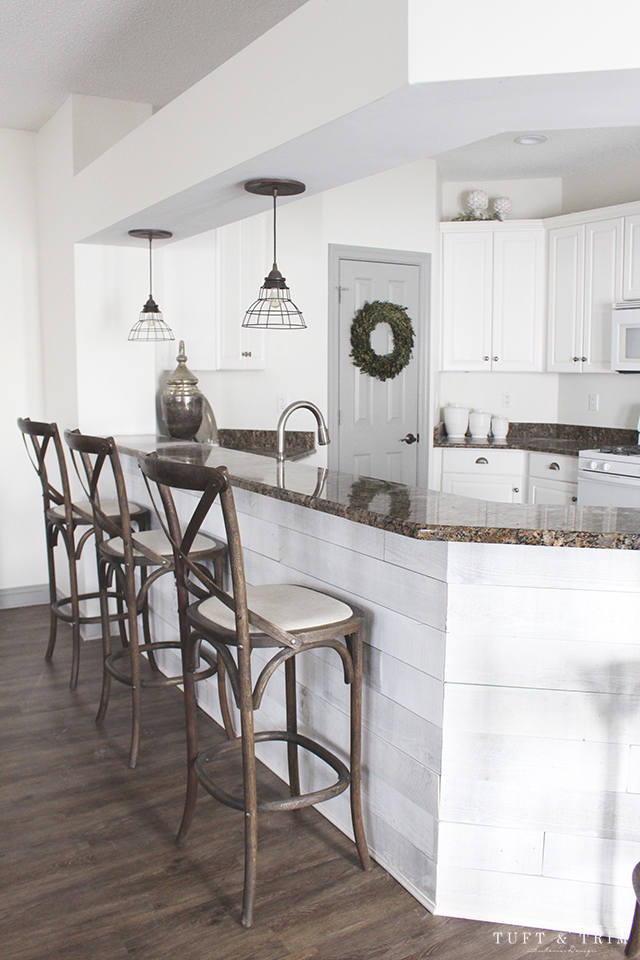
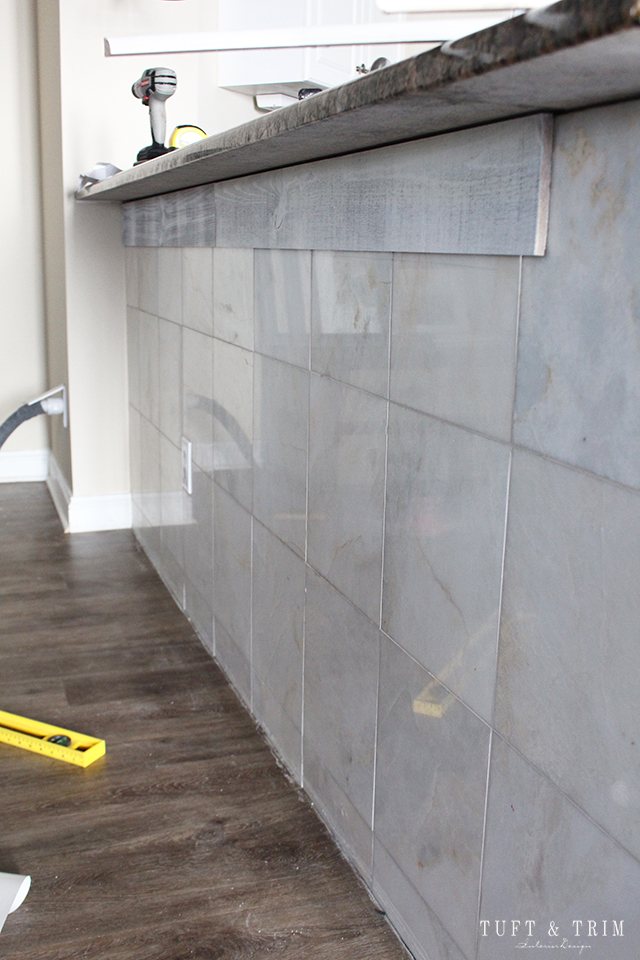
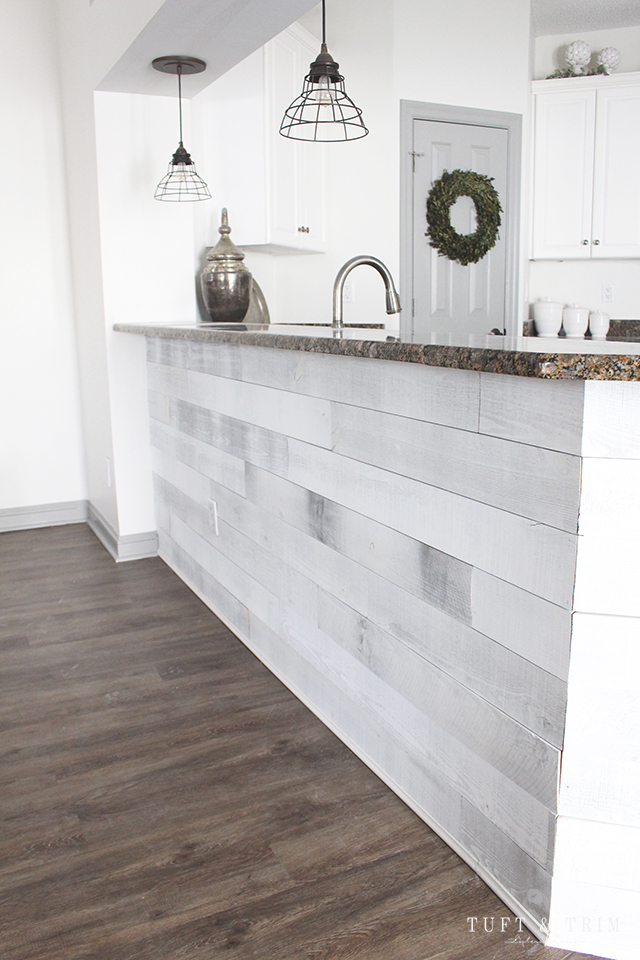
Before
After
Along with the reclaimed wood island, we also decided to update the paint (thank goodness).
It was quite the project but definitely helps coordinate with the white washed barn wood. I also
loved how the wood floors and bar stools stand out against the white by creating contrast.
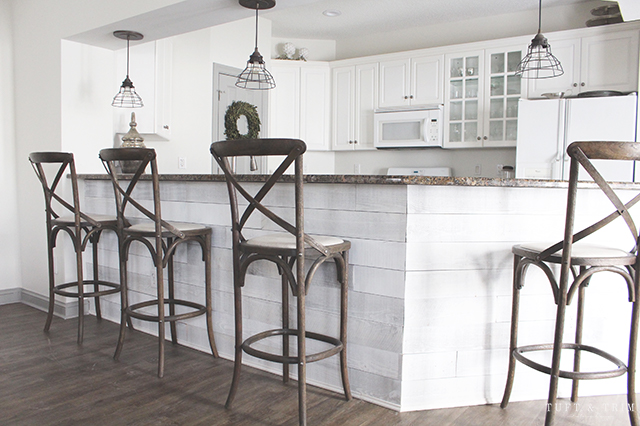
Before
After
Supplies:
- Timber wall XL Peel & Stick Woood
- Miter saw
- Orbital Sander or Sandpaper
- Digital Angle Finder
- Jigsaw attachment
- Trim
- Level
- Tape measure
- Phillips head screw driver
- Pen/pencil

Step 1. Clear Surface

Before you get started, make sure the surface is clean and any trim has been removed.
2. Measure
Measure the height of bar and divide it by the width of plank, this will help you find out how many
planks are needed to cover the surface. You may find that there is a gap on one end, decide
if you want the gap on top or bottom. We chose to leave the gap on the bottom and cover it with
a quarter round.
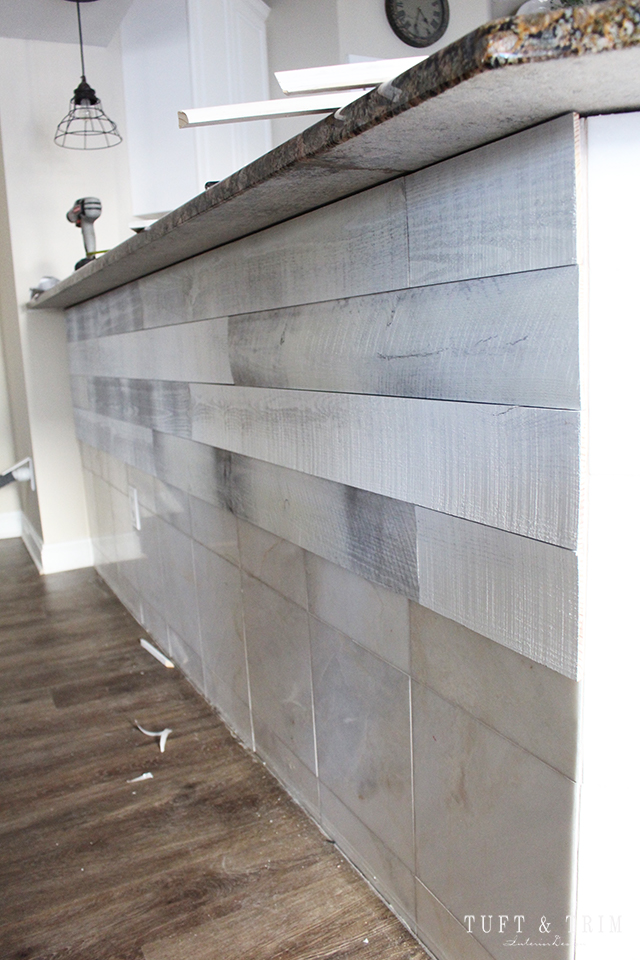
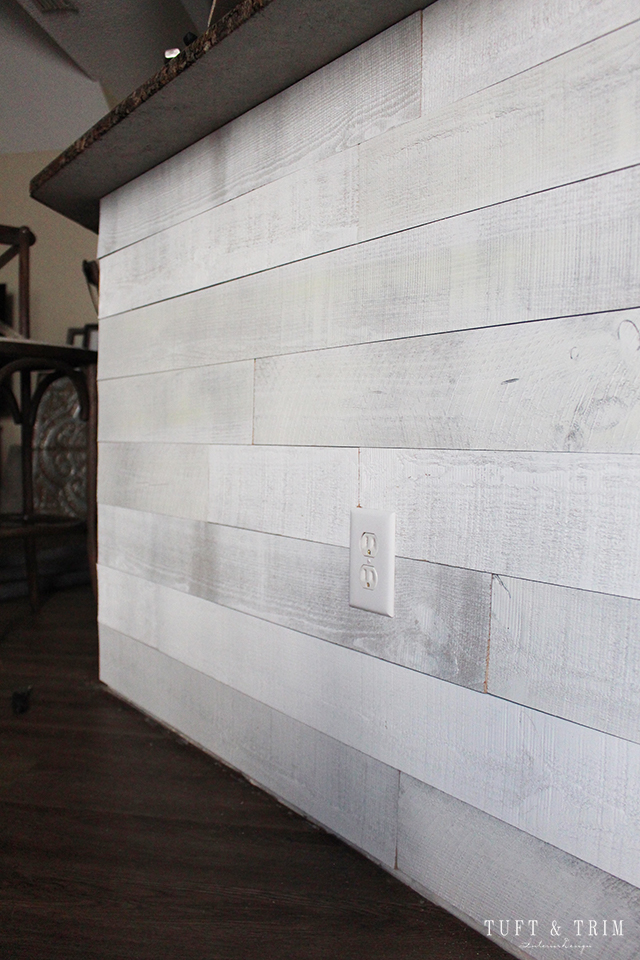
3. Peel & Stick
Next, make a level line at the appropriate distance from the bar top and begin placing boards
along that level line.
Caution: once the tape plastic is removed it is exceptionally sticky, so measure
twice and place once. You won’t be able to take it off very easily once it’s on there.
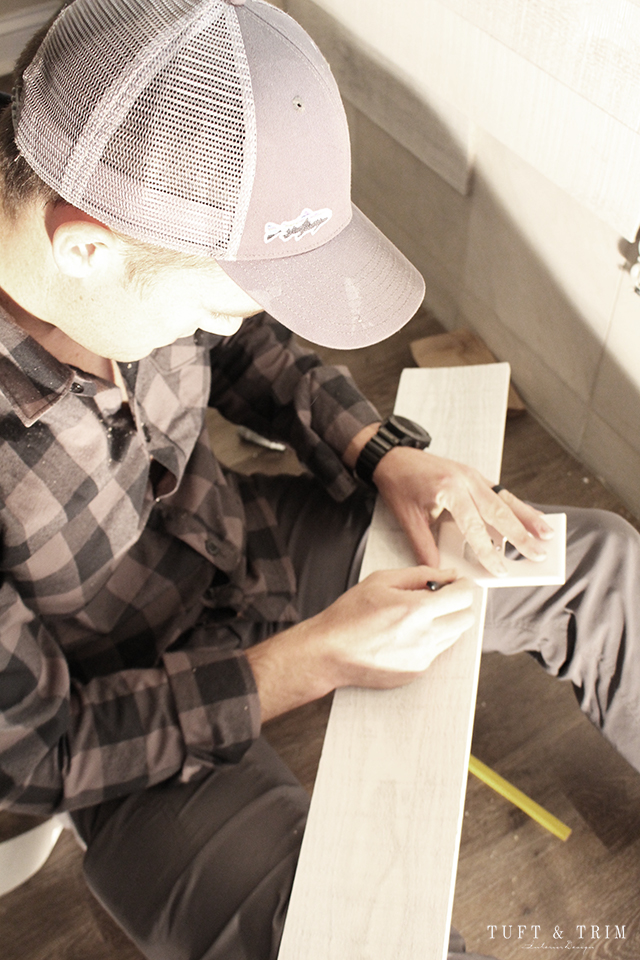
4. Cut
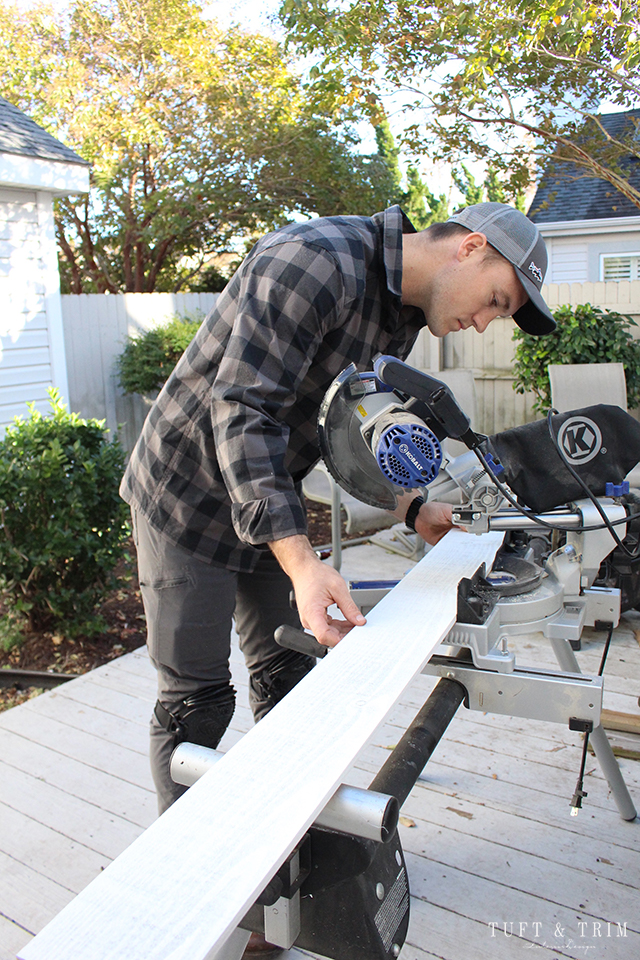
Once you get to an angle or end of wall, measure the distance
to the end, and cut the appropriate angle (90 for an end piece or half the
total angle for a corner piece that is joined) with the Miter saw.
5. Outlets
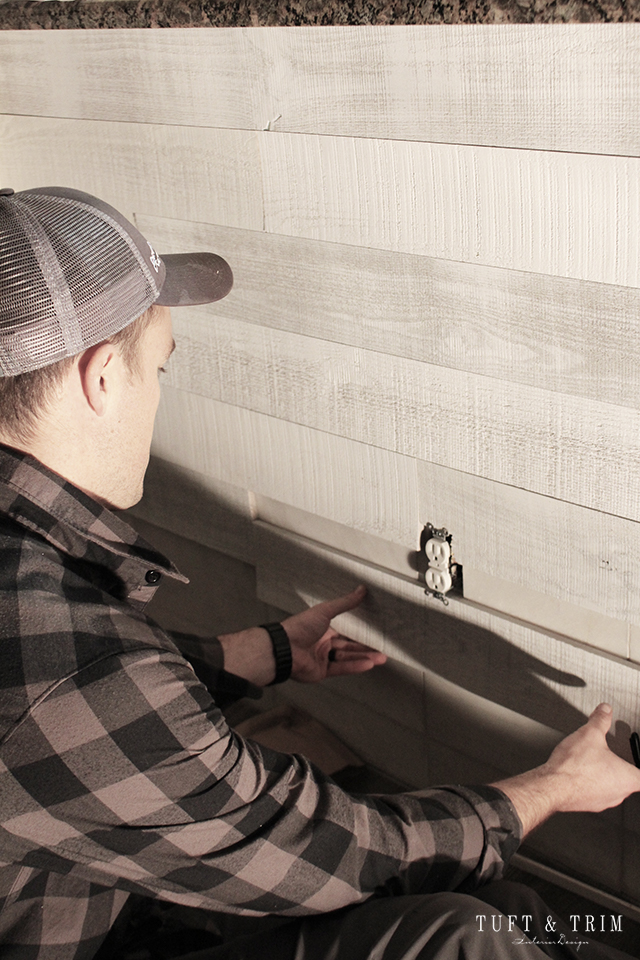
You will need to measure where the outlet is in relation to the plank and cut around where the
outlet will be located.
Use your pen to trace around the outlet. You will want to use a jig saw attachment to cut the
outlet dimensions. Cut just inside your measurement as you want the plate to cover all of the cuts.
You will most likely need longer faceplate screws to attach the faceplate over the wood.
6. Corners
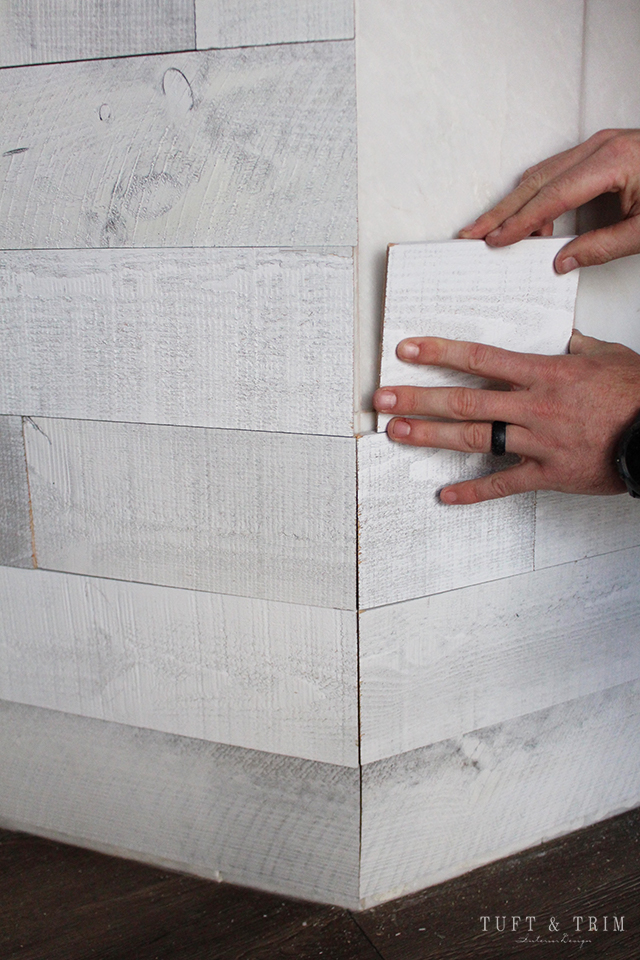
If you have any corners, you will want to make sure you cut the wood at an angle so they run
into each other correctly. This is where an angle measurer comes in handy for calculating the angle
for the miter saw to cut.
7. Trim
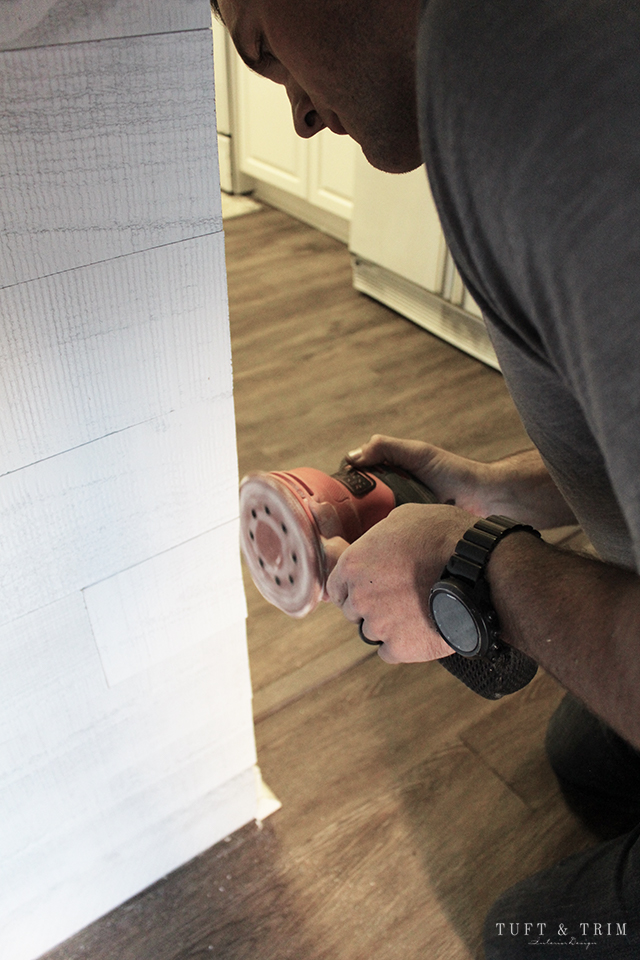
Finish up by sanding down the edge so that all the planks are even, this will allow an end trim to
stick if you chose to cover up the end of the planks. We glued
a 3/4″ trim piece that covered the wood perfectly. Then we finished off the bottom
by glueing on a quarter round (we couldn’t Brad nail due to the tile underneath).


Well, there you have it! Not too hard, right? I have to give a shout out to my husband for taking
on the project, and allowing me to take pictures while he worked. What a gem!
Now on to the next project, you’ll have to stay tuned so you don’t miss out!
Get the look:
[carousel_slide id=’2085′]
[do_widget id=text-15]

[…] Another DIY project we did was the reclaimed wood island makeover. I shared how we did it earlier this year on a blog post. You can check that out here. […]